
The cool part of this post is students’ arguments in part 3, but I wanted to share how we got there, and what we did with it. Overall a great day in Physics I.
We started the day by introducing a force as the book does:
A force is as a push or pull
A force always acts on an object (that experiences the force)
A force always occur because of agent (who exerts the force).
I add to that definition that a force is something that happens (like a party), and that it could be happening for a while but later not be happening.
1. Normal Force Bridging Analogy:
We then did the Normal Force Bridging analogy from Preconceptions in Mechanics. We do demonstrations, vote, and discuss the following situations.
- Is table exerting a force on the table?
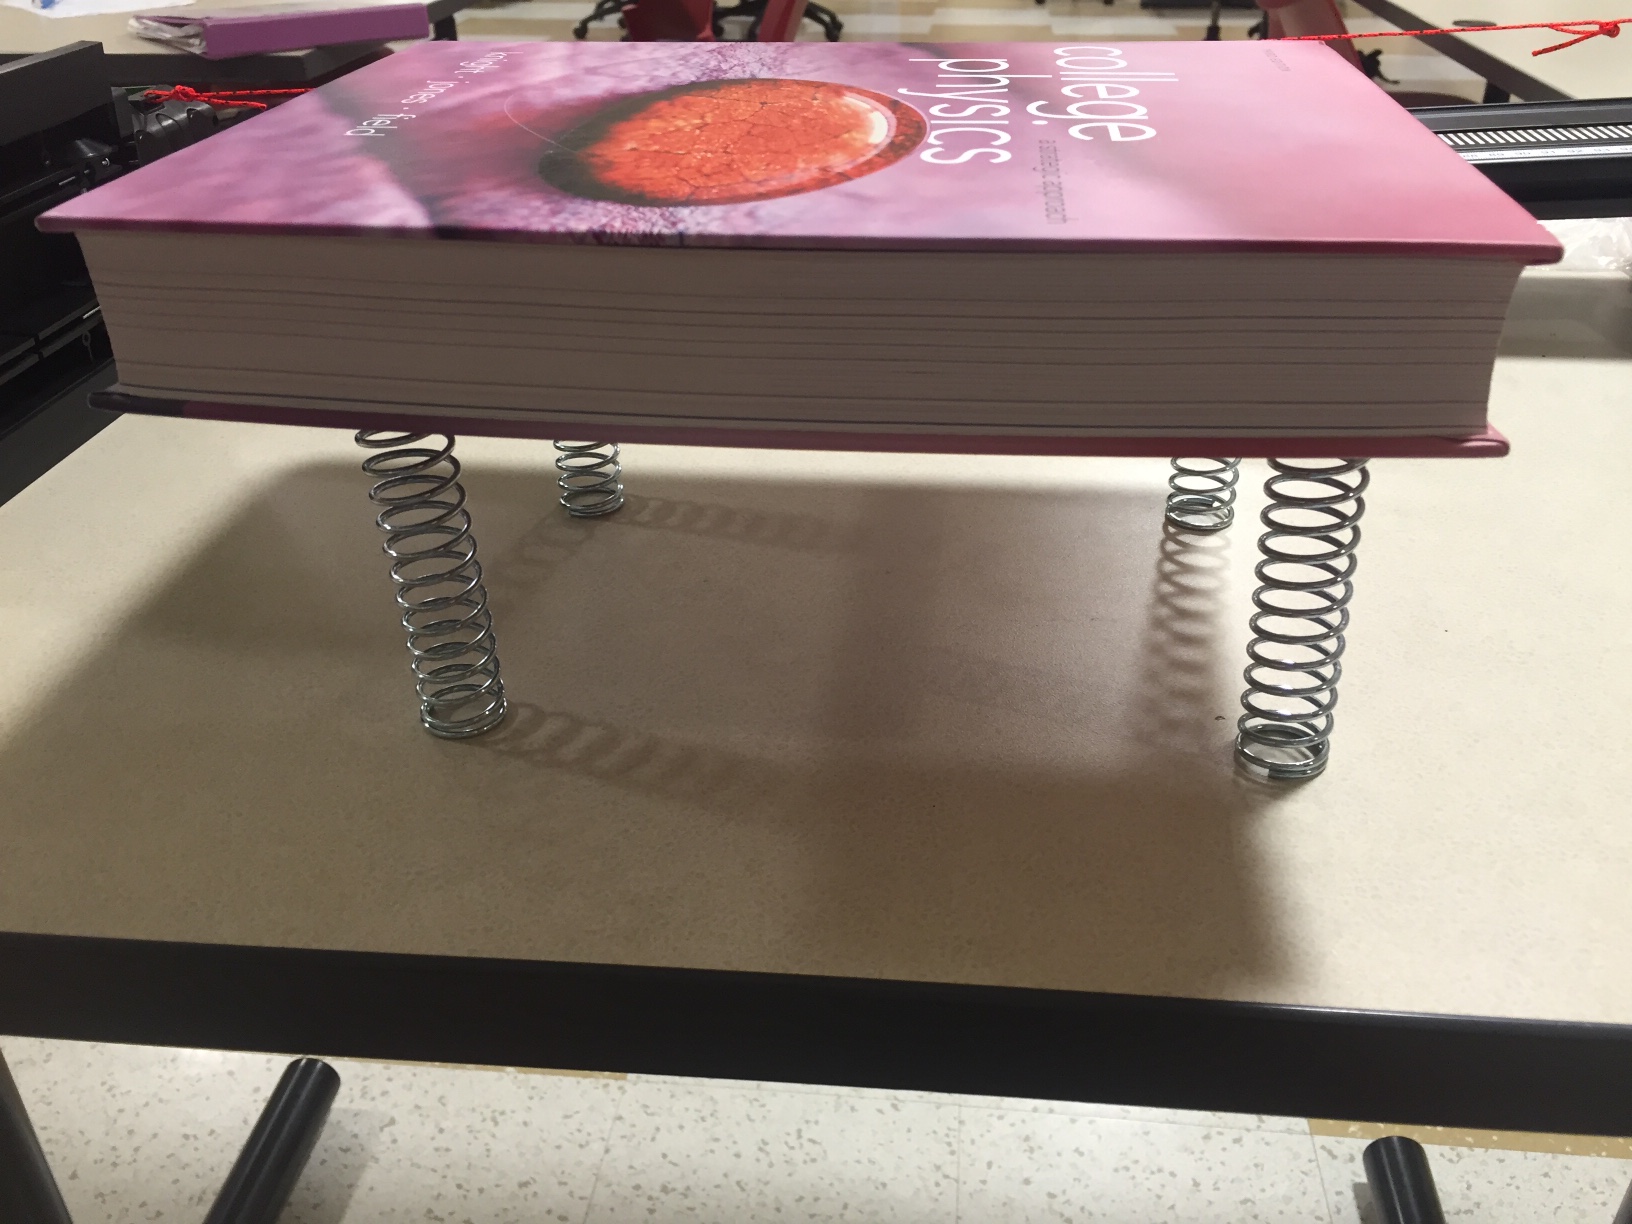
- Is the spring exerting a force on my hand?
- Is the spring exerting a force on the book?
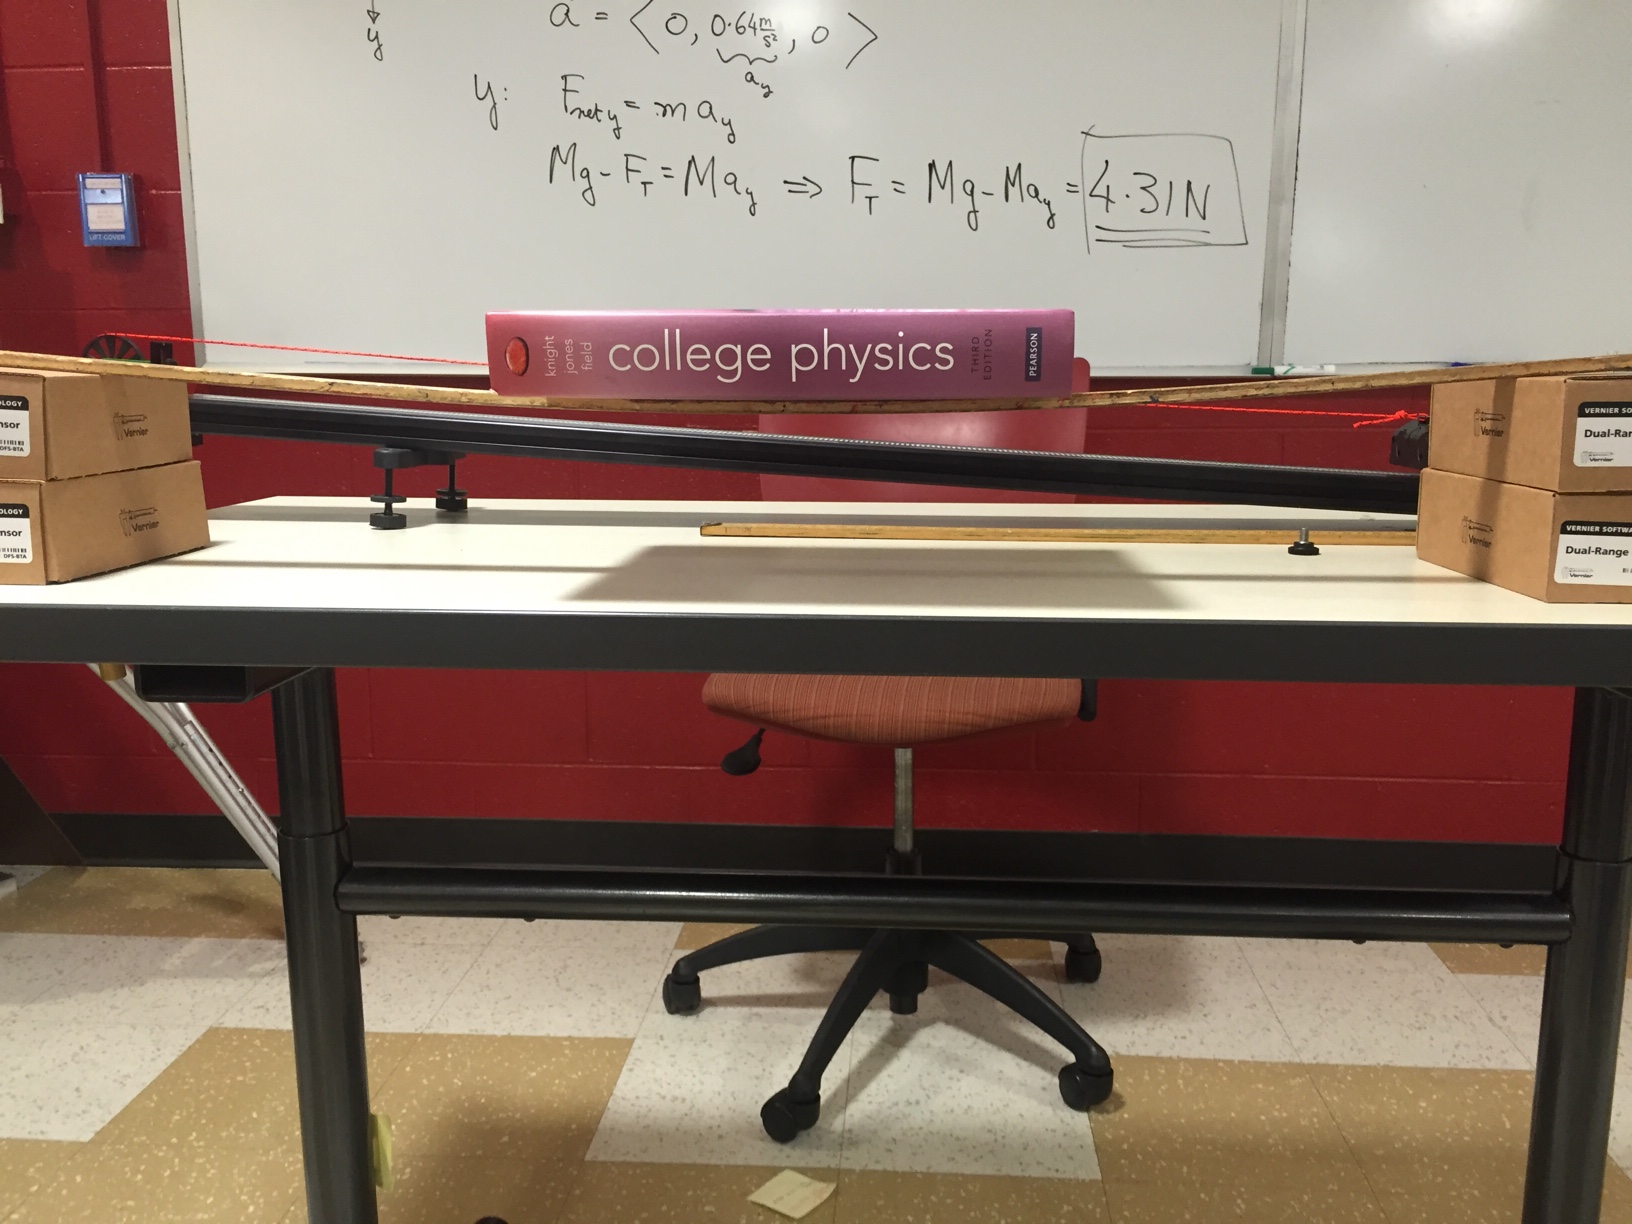
- Is the meter stick exerting a force on the book? (What about two, three, or four metersticks?)
- Is the foam exerting a force on the book?
- Is the table exerting a force on the table?
The point is to keep the conversation focused on observable evidence of pushing (deformation, compression,). Then you do an experiment with a laser on a mirror that’s been placed on the table. And then you stand or sit on the table. That went pretty well.
2. Identifying Forces- Example and then Whiteboarding:
A Brief Lecture to Introduce a few other Forces, then a Demo to Model how to identify forces:
Knight’s books starts, not by drawing free body diagrams, but by drawing a picture, identifying the object of interest, drawing a boundary around the object, identifying an other objects that cross the boundary (exerting contact forces), and then identifying any long-range forces.
I modeled how to draw a good picture and identify the forces for the setup above, and then students white-boarded 4 situations.
3. Pre-Lab Clicker Question: What does a force do?
After debriefing on the white-boarding, I transitioned to identifying when forces are happening to what do forces do. I posed the following clicker question:
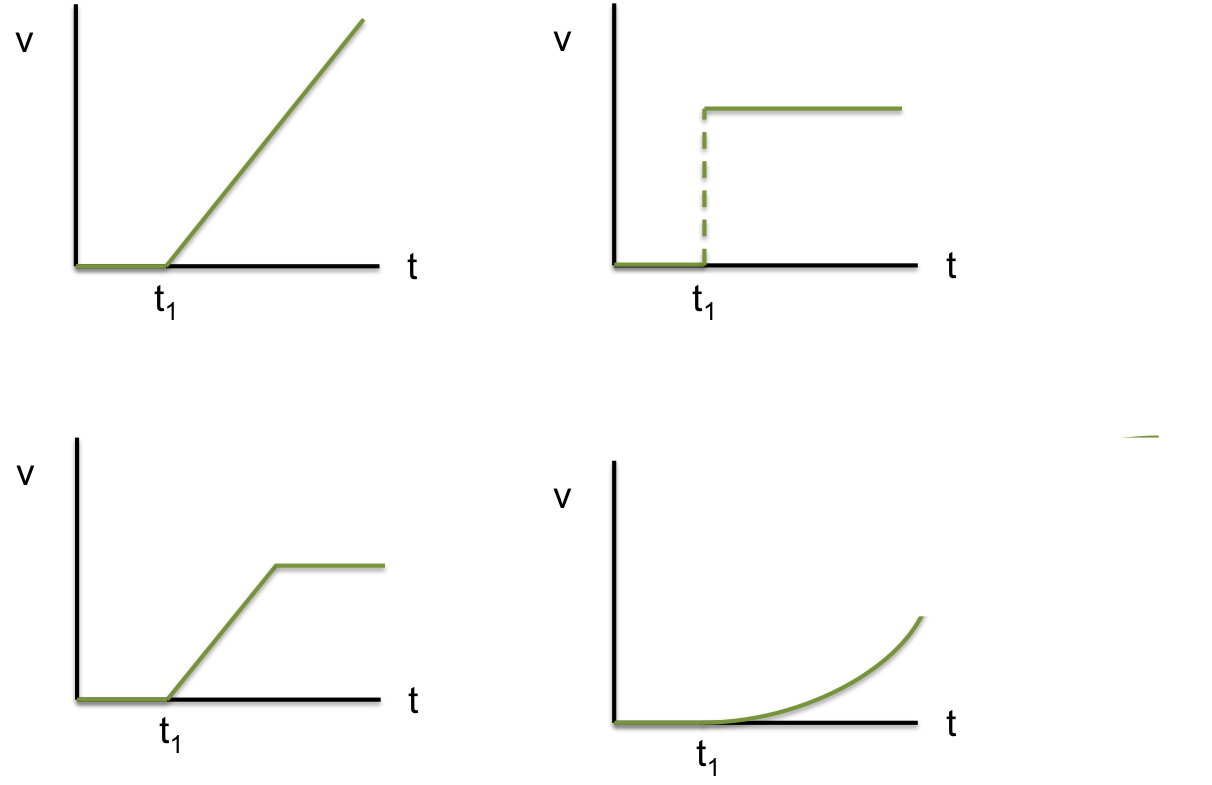
“A cart on a track starts at rest. At time, t1, you push on a cart with your finger. As it moves you keep your finger pressure the same for the remaining time.”
Student arguments were really cool:
A. It has to either be the top-right or the bottom-left. The problems says the finger is pushing the same way, so that means it’s going to move with a constant speed. It might be that you’ll be able to see it speeding up, or it might happen so quickly it looks like a jump.
B. It has to be either of the top two. It says the finger pushes the same way. I don’t see how it could be the bottom-left, because the finger is doing the same thing the whole time. How could the graph change what it’s doing if it’s finger doing the same.
C. I don’t think it could be the top right, because the velocity can’t just jump up to a speed right away. When you are driving in your car, you can’t just go from 0 mph to 50mph immediately, the speedometer has to pass through all the speeds in between.
D. The question says that finger is pressing with the same pressure, but I don’t necessarily think that means you push with the same speed. It doesn’t say you push with the same speed. I’m still trying to figure out what same pressure on your finger would do. Like, If you push something uphill, the same pressure might not be enough to push it up, or it might be just enough for it to keep a speed. But if you push something on a flat track, same pressure might be enough to keep it speeding up.
E. I think it depends whether there is friction. Like if you are pushing something across a carpet, there’s a lurch. Like it’s not moving and then all of sudden it goes. With the cart’s in this class, there’s not much friction, so there’s not going to be a lurch. The only graphs that are smooth looking, are top-left and bottom-right. After t1, they do a smooth thing.
Students had a good conversation, and I facilitated well—mostly using re-voicing to clarify and compare/contrast ideas. The usual suspects in class were contributing, of course, but a lot more people jumped in, which was good.
4. Lab Exploration:
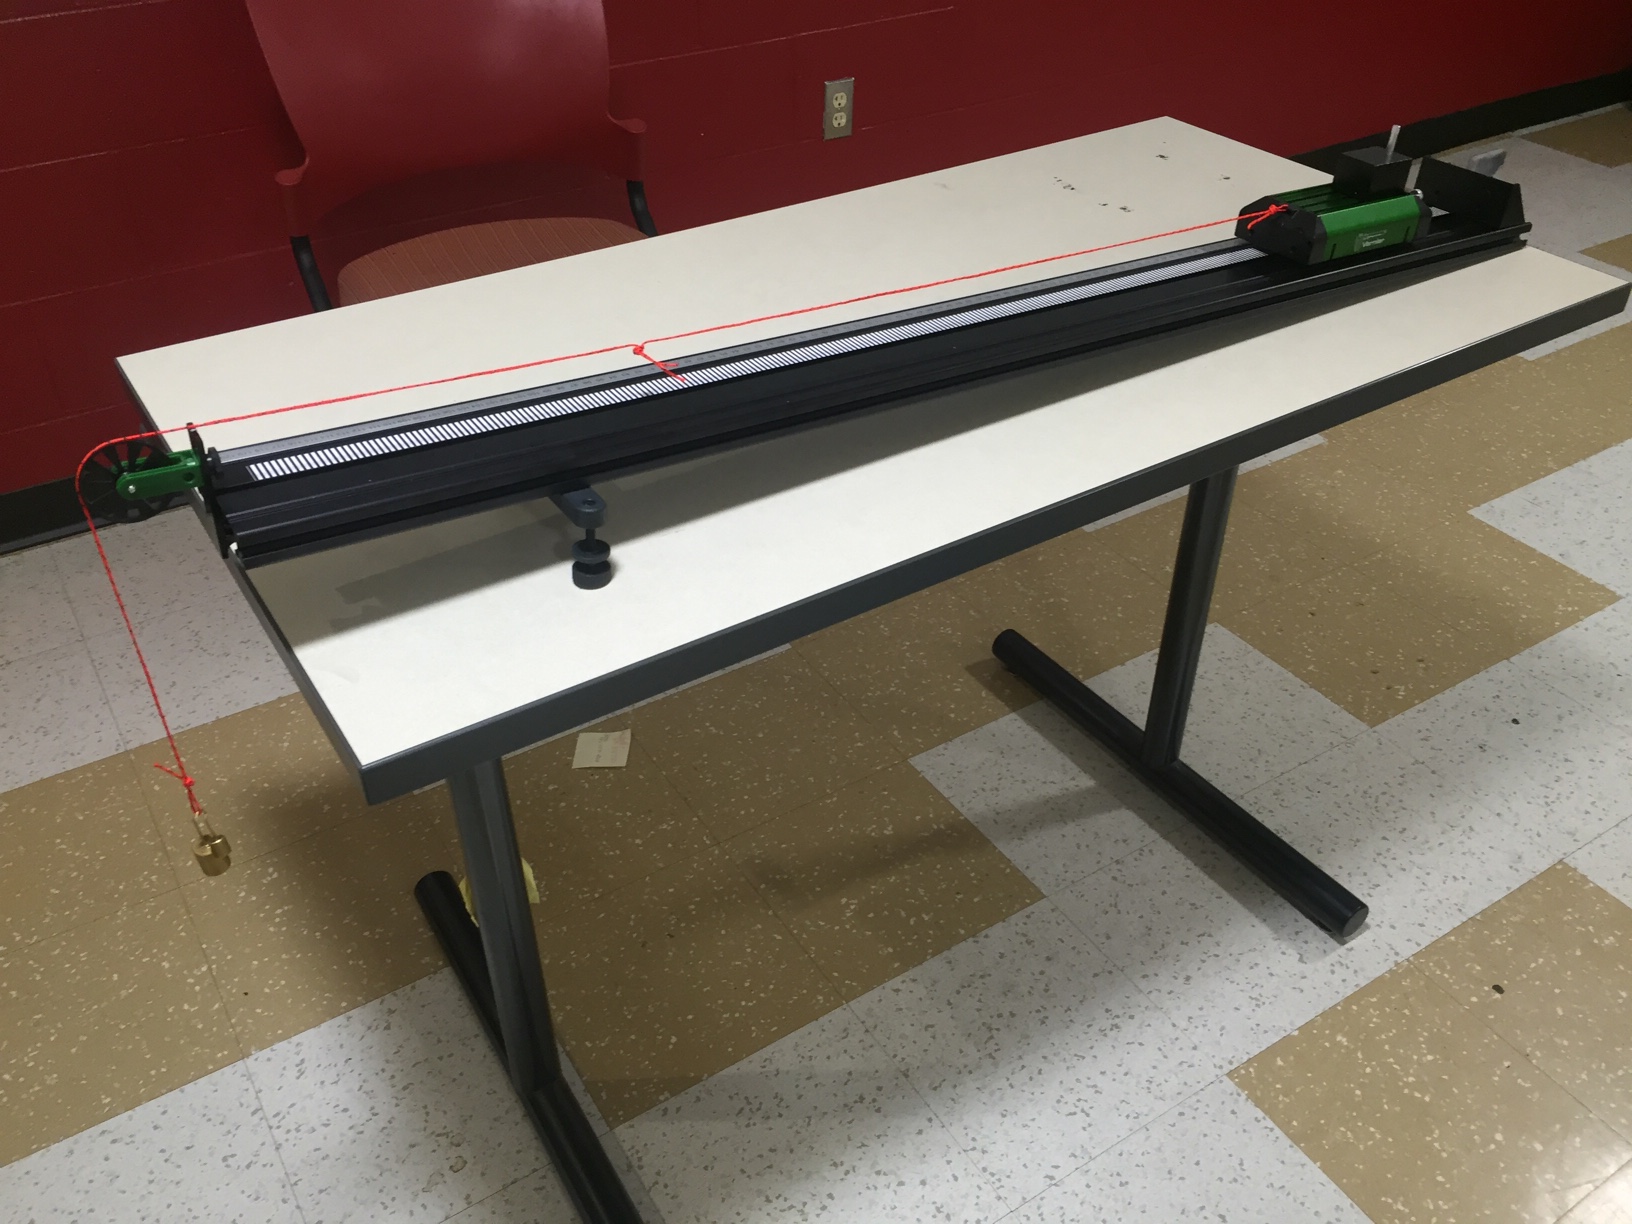
Students were then asked to do some experiments to help us decide what forces do. They did their experiments with Fan Carts and Motion Detectors that mirrored our discussion.
Experiment 1: Make a Velocity vs Time graph (Record on whiteboard]
Experiment 2: Set fan to higher settings (Record on same graph, see what if anything changes)
Experiment 3: Do an experiment of your choosing
- Some groups changed the mass of the cart
- Some did slowing down instead of speed up
- Other groups added friction or obstacles along the track
- Other groups wanted to try longer tracks (to see if it would level out eventually)- I gave these groups hover pucks to play with out in the hallway.
While circulating, we had lots of really good discussion and questions about what they were seeing, what it did or didn’t show evidence for, what would be different if there was friction, etc.
The pre-lab clicker question did a really good job of setting up the lab exploration. Students knew what they were trying to do and had a sense of purpose– help us decide what a forces does. Students found a nice balance between pursuing the lab goals and playing around to see what happens. For example, one group kept trying to change the mass of the cart so that a buggy and the cart would get across the track at the same time. Another group tried to add just enough mass to the 2nd fan cart setting so that it would accelerate that the same as the 1st fan cart setting with now mass. They were heard cheering loudly when they made that happen.
